Maintenance & Care
How to Descale an Espresso Machine
Scale buildup kills espresso pressure and ruins extraction. Here's how to descale your machine properly, how often to do it, and which descaler to use.
Descaling removes the mineral buildup (calcium and magnesium deposits from your tap water) that accumulates inside your machine's boiler, thermoblock, and internal tubing. Left unchecked, limescale constricts water flow, forces the pump to work harder, lowers brewing temperature, and eventually kills machines well before their time. The process takes about 30 minutes and needs no special skills; you just need the right descaler and a bit of patience.
Why Limescale Is Actually a Problem
Fresh espresso machine limescale looks chalky white and harmless. It's not.
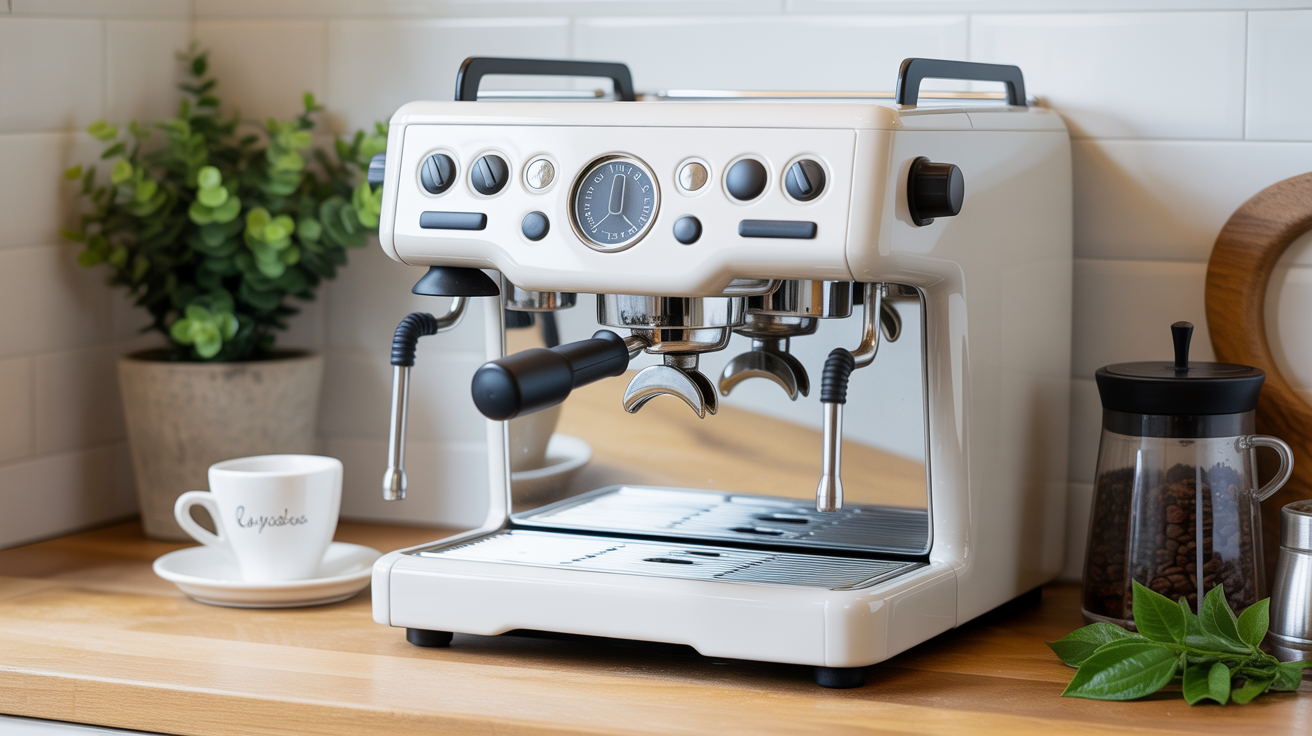
Inside your boiler, scale acts as insulation. The heating element has to work longer and hotter to push water to brew temperature, which means you're using more electricity and stressing the element. In a thermoblock machine (common in home semi-automatics like the Breville Barista Express), scale flakes can break loose and clog the narrow channels that regulate water distribution. You'll notice this as inconsistent shot pressure, longer pre-infusion times, or a machine that suddenly can't hold 9 bar.
The pump suffers too. Most home espresso pumps are rated for 10-15 years, but that assumes clean internal pathways. A heavily scaled machine can wear a pump out in three to five years.
Scale also affects taste. Water that's been sitting in scaled tubing picks up a faint metallic or chalky note. It's subtle but you'll notice it if you pull shots daily.
How Often to Descale
This depends almost entirely on your water hardness, not how much coffee you make.
| Water hardness | Descale frequency |
|---|---|
| Soft (0-7 gpg / 0-120 ppm) | Every 3-4 months |
| Moderate (7-14 gpg / 120-240 ppm) | Every 6-8 weeks |
| Hard (14-21 gpg / 240-360 ppm) | Every 4 weeks |
| Very hard (21+ gpg / 360+ ppm) | Every 2-3 weeks |
To find your hardness, check your municipal water report (most cities post annual water quality reports online) or buy a cheap test strip pack, usually under $10. If you use a Brita or similar carbon filter, note that these don't remove hardness minerals; only reverse osmosis or a dedicated water softener does that.
Many machines have a scale indicator light that triggers on a timer or shot counter. Treat these as minimums, not gospel. If your water tests very hard, descale more often than the light suggests.
Using third-party filtered water (like Third Wave Water packets mixed into distilled) largely sidesteps the buildup problem and is worth considering if you're in a hard-water area.
What to Use for Descaling
Citric acid vs. commercial descalers
Citric acid is the cheapest option. A bag costs a couple of dollars and it works. The issue is that some manufacturers (notably DeLonghi, Breville, and Jura) void warranties if you don't use their branded descaler or an equivalent commercial formula. Their descalers typically use a blend of lactic and sulfamic acid, which they argue rinses more cleanly from internal components.
If your machine is under warranty, use the manufacturer's descaler or check the warranty language carefully. If it's out of warranty, citric acid at 1-2% concentration (about 5-10g per liter of water) works fine.
Avoid white vinegar. It's too acidic, leaves an odor that's hard to flush out, and can degrade rubber seals over time. Several repair techs I've spoken with specifically call out vinegar-descaled machines as having seal problems that legitimate descalers don't cause.
Mixing ratios
Follow the descaler packet exactly. Most commercial descalers ask for one packet (or 30ml of liquid) per liter of water. Stronger is not better; high concentrations can pit internal components.
How to Descale an Espresso Machine: Step by Step
The process below covers most semi-automatic home machines. Check your manual for model-specific steps. Some machines (Jura, in particular) have automated cleaning cycles you trigger from the menu rather than running manually.
What you need:
- Descaling solution (commercial or citric acid)
- Fresh water (about 1 liter)
- Large container or pitcher (at least 1 liter capacity)
- 30 minutes of time when you don't need the machine
1. Empty and prepare
Remove and empty the water tank. Remove any water filter cartridge, because descaler will damage the filter media and you don't want it filtering out the descaling agent anyway.
Turn the machine off and let it cool for 10 minutes if you've been using it recently. Mix your descaling solution with water per the packet instructions and pour it into the tank.
2. Safety first: protect your hands and surface
Descaling solutions are mildly acidic. Wear gloves if you have sensitive skin. Put the collection tray or a towel under the group head and steam wand before you start. Solution will flow through both, and the table beneath doesn't need an acid bath.
Don't leave descaling solution sitting in the machine longer than the instructions recommend. Some formulas specify a maximum dwell time; exceeding it can damage O-rings.
3. Run the descaling cycle
If your machine has a dedicated descaling mode, activate it now. These modes typically cycle water through in short bursts, pausing to let the solution work, then flushing.
If you're running a manual process:
- Place your large container under the group head and steam wand.
- Turn the machine to brew mode and let it run until it dispenses about 100-150ml through the group head, then stop.
- Wait 5 minutes. This lets the solution sit in the boiler and heat exchanger.
- Resume and run another 100-150ml, then stop again.
- Repeat this start-pause-wait cycle until the tank is empty.
- Do the same through the steam wand: open it briefly to push solution through, wait, repeat.
The pause-and-wait cycles matter. Constant flushing pushes solution through too fast for it to dissolve deposits in the boiler walls. Short dwell times do most of the actual work.
4. Rinse thoroughly
Empty the container. Rinse the tank well. Fill it with clean, fresh water.
Run the full tank through the machine using the same cycle approach: bursts through the group head and steam wand, not one continuous flush. You want to displace all the descaling solution from every internal path.
Repeat this rinse with a second tank of fresh water. Two full rinse cycles is the minimum. If you can still smell the descaler when you catch water at the group head, run a third.
5. Reinstall the filter and test
Put the water filter back in (if you use one), refill the tank with fresh water, and run two blank shots through the group head without coffee. Taste the water from the second one. It should taste clean, with no trace of the descaler's chemistry.
After that, you're done. Pull a real shot and compare it to a shot from before the descale. You may notice a slightly faster flow rate, better pressure consistency, or a cleaner aftertaste.
Signs Your Machine Needs Descaling Now
These are worth knowing even if you keep a regular schedule:
- Shots run noticeably slower than usual (under-extraction is the frequent result)
- Machine takes longer to reach brew temperature
- Steam output is weaker than normal
- You hear the pump working harder or making more noise than it used to
- White or off-white deposits visible on the group head or around the drip tray
- Your machine's scale warning light is on
Any of these on their own could have other causes, but two or more together usually means scale.
Descaling vs. Other Cleaning Tasks
Descaling is not the same as backflushing, and the two don't substitute for each other. Backflushing cleans coffee oils from the group head and solenoid valve using a blank portafilter basket and cleaning detergent. Descaling removes mineral deposits from the internal water circuit. Both matter.
A well-maintained machine needs both: backflushing weekly or every 20-30 shots for oil and residue, descaling on the schedule above for mineral buildup.
Your grinder also needs regular attention. Stale coffee oil buildup inside the burr chamber can make shots taste off even when the machine is clean. The process is simpler than it sounds: see our guide to cleaning a coffee grinder if you haven't done it recently.
These aren't optional extras. An espresso machine is a pressurized heat-and-water system. Treating the cleaning tasks as a routine, like changing the oil in a car, keeps it running accurately for years.
Frequently Asked Questions
Can I use white vinegar to descale my espresso machine?
Technically it works, but I'd avoid it. Vinegar is more acidic than most descaling solutions, it can degrade rubber seals over time, and the smell is difficult to fully rinse out. Some machines have lingered with a faint vinegar note through dozens of rinse cycles. Citric acid is cheap, food-safe, and rinse-clean. A better alternative if you don't want to buy a commercial descaler.
How do I know if my water is hard enough to worry about?
Check your city's water quality report, usually available on the water utility's website. Look for "hardness" expressed in mg/L (ppm) or grains per gallon (gpg). Anything above 120 ppm / 7 gpg is worth descaling on a regular schedule. You can also buy test strips online for under $10.
My machine has a water filter. Do I still need to descale?
Yes. Most in-tank filters (including the standard Brita-style cartridges in Breville and DeLonghi machines) use activated carbon to reduce chlorine and improve taste. They don't remove hardness minerals. Only reverse osmosis systems or dedicated ion-exchange softeners cut hardness. Change the filter on schedule, but still descale.
How long does descaling take?
Plan for 30 to 45 minutes, including both descaling cycles and rinse cycles. Automated programs on machines like Jura or Sage/Breville models sometimes run longer. Don't rush the rinse phase — it's easier to spend the extra 10 minutes rinsing than to pull a shot that tastes like citric acid.
Will descaling fix my slow shots?
Sometimes. Slow shots have a few possible causes: grind size, dose, puck prep, or a clogged shower screen. Scale is one cause of slow flow, particularly if the problem developed gradually rather than suddenly. If your grinder settings and dose haven't changed but shots have gotten progressively slower over months, scale is a reasonable suspect. If the flow was always slow or changed suddenly, look at grind and distribution first.